Skip to content
Excel’s best keyboard shortcuts for color filling (Basic & Advanced):
The majority of Excel users regularly have to fill in the background color in a cell or range of cells.
Excel’s built-in option on the ribbon makes filling a cell with color relatively simple, but it’s not the quickest method.
Knowing quicker ways to fill in color in a cell would increase your efficiency and save time if you had to do this several times per day.
Of course, you may always amaze your boss and coworkers by using the shortcuts and techniques I discuss in this video.
This instruction explains:
1. Typical Method for Filling Color in Cells
2. Excel Shortcuts for Filling Color in Cells
3. Shortcut on the Keyboard to Fill Color in Cells
4. Fill Color Option Should Be Added to the Quick Access Toolbar (QAT)
5. Repeating the Fill Color Operation with F4
6. [Advanced] Using VBA, Make Your Own Shortcut for Filling Color
7. How to Quickly Copy and Fill Colors in Paint Format
Typical Method for Filling Color in Cells:
Let me briefly demonstrate the standard method for filling color in Excel before I show you some shortcuts:
- Choose the cell or range of cells that you want to color-fill.
- Choose the “Home” tab.
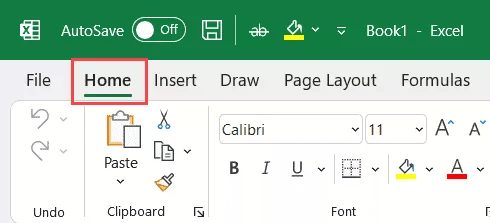
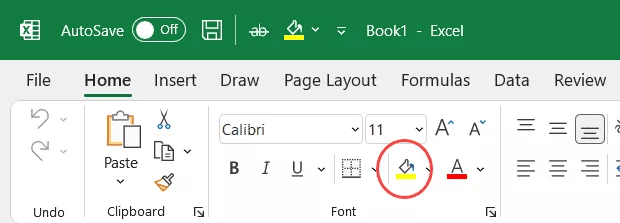
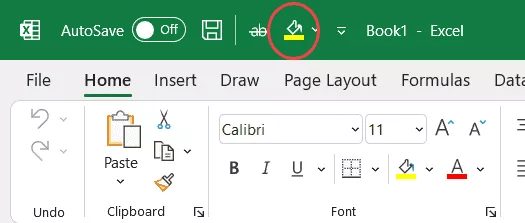
3. Click the “Fill Color” icon under the Font group.
4. Select the colour you wish to use by clicking on it.
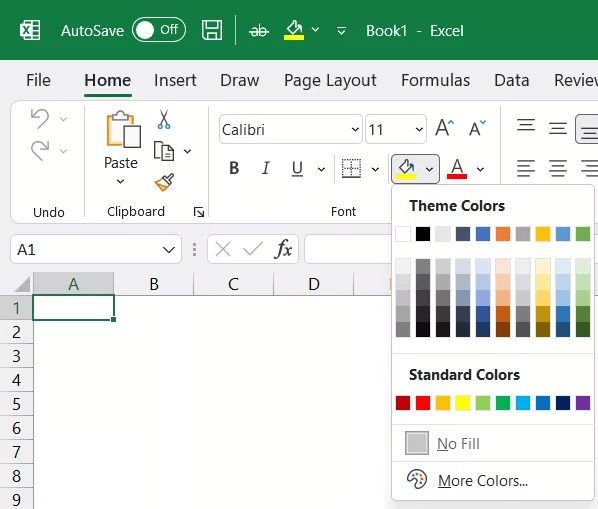
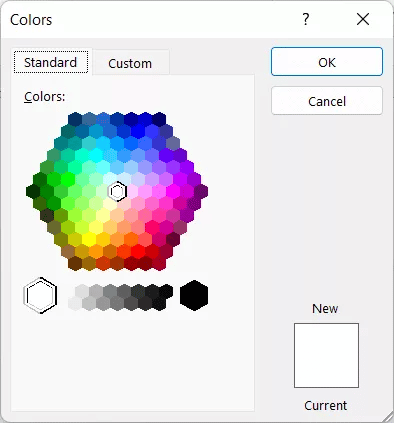
Click on the “More Colors” options if you can’t locate the colour you want to fill in the possibilities that appear in Step 3.
This will bring up the colours dialogue box, where you can select from a wider range of colours and enter hex or RGB codes.
Fun fact:
Excel supports over 16.6 million different color schemes.
Excel Shortcuts for Filling Color in Cells:
Let’s examine a few quick techniques for colors Excel cells.
Keyboard Shortcut for Cell Color Filling:
Let’s start with a keyboard shortcut that will enable you to rapidly access the menu that displays all the colors you can use to fill a cell (all the selected range of cells).
ALT + H + H
To apply this keyboard shortcut, you must first choose the cell or range of cells you want to fill with colour before pressing these keys one after another (ALT then H, and then H).
By pressing the Enter key after using the arrow keys to travel to the colour you wish to fill, the aforementioned keyboard shortcut would launch the Fill Color panel, which displays all the available colours.
One significant disadvantage of this method is that you cannot select the colour you require using the keyboard shortcut, despite the fact that it may seem quicker than using your mouse to click on the Home tab, then click on the colour panel, and then select the colour. This keyboard shortcut takes a while to use because you have to use the arrow keys to select the desired colour.
Advantages of this shortcut:
- faster and easier compared to using a mouse (once you get used to it)
- lets you avoid switching from the keyboard to the mouse.
Drawbacks to this shortcut
- does not enable color selection and requires arrow keys for navigation
- faster than anticipated
- Hard to recall
Pro Tip:
The keyboard shortcut ALT + H + H + N can be used to swiftly remove the color from a cell or group of cells.
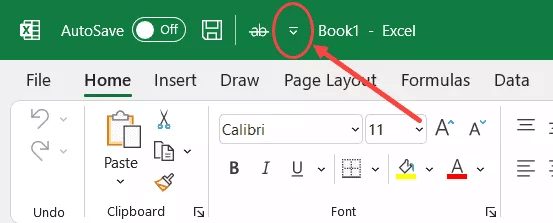
Fill Color Option Should Be Added to the Quick Access Toolbar (QAT)
The Fill Color icon can also be added to the Quick Access Toolbar so that you can always access it with a single click.
Therefore, you may get the same option with a single click rather than first going to the Home tab and then looking for the Fill Color icon.
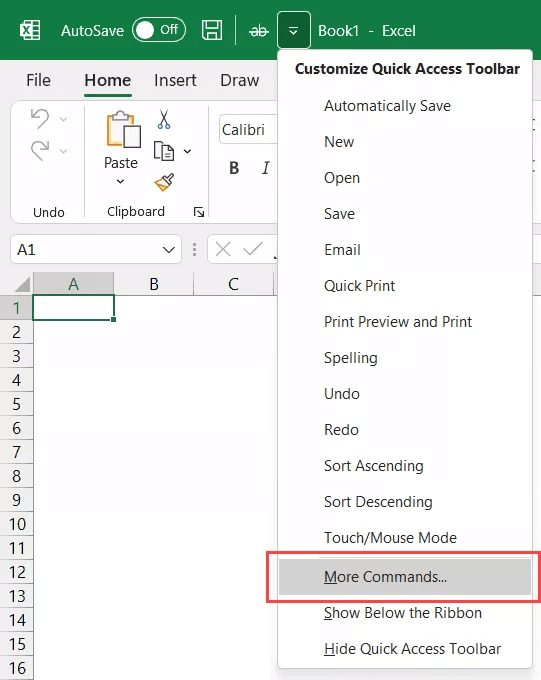
The actions to add the fill colour icon to the Quick Access Toolbar are listed below:
- Click on the “Customize the Quick Access Toolbar” icon in the Quick Access Toolbar.
2. Click on “More Commands” from the list of choices that appears.
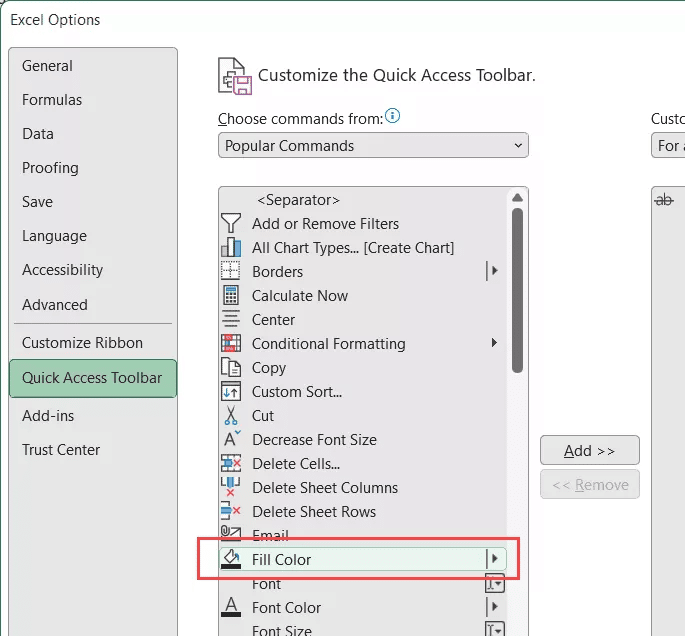
3. Pick the ‘Fill Color’ icon option in the ‘Excel Options’ dialogue box that appears.
4. Press the Add button.
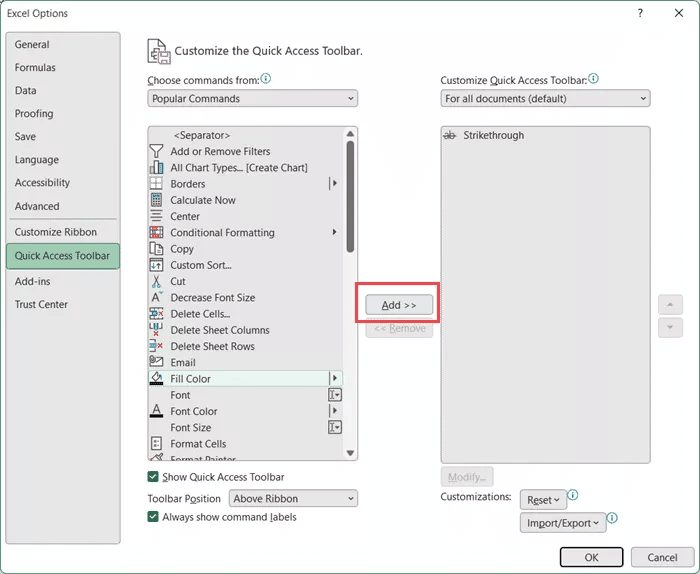
5. Press OK.
The fill colour icon would be added to the QAT using the techniques above.
Simply choose the “Fill Color” symbol in the QAT to utilise it, and a palette of available colours will appear.
The ability to access these icons through a straightforward keyboard shortcut is a significant advantage of including them in the Quick Access Toolbar:
Number + ALT (which is the position of the icon in the QAT)
In our scenario, I may use the keyboard shortcut ALT + 2 because the Fill Color icon is the second choice in the QAT (where I need to hold the ALT key and then press the 2 key)
As you can see, this keyboard shortcut is far superior to the standard ALT + H + H keyboard shortcut for the fill color icon.
Pros
- The Fill Color choice is always available with a single click.
- In the QAT, the keyboard shortcut for icons is often shorter.
Cons
- First, you must include the Fill colour icon in the QAT (one-time effort)
- It only saves you one click if you access it using the mouse (so not significantly better than using the option in the ribbon)
Repeating the Fill Color Operation with F4:
Although there isn’t technically a direct keyboard shortcut for this, if you’ve already used one of the methods above to fill colour in a cell or range of cells, you can do it again by using the F4 key.
The Excel F4 key may be used as follows to fill cells with color:
- Choose the cell that you wish to fill with colour.
- To fill the chosen cell with colour, use the keyboard shortcut or the Fill Color button in the ribbon.
- Decide which cell or range of cells you wish to fill with the same colour by selecting them now.
- Press the F4 key.
In Step 4, pressing the Restorer key causes the action that was just completed to be repeated.
In our example, the F4 key performed the same operation since we first filled a cell with a certain colour before using it.
As long as you don’t change anything, you may keep pressing the F4 key to fill colour in many cells/ranges.
Even worksheets and other open workbooks may be used with this.
Pros:
- Time-saving since you just need to do the activity once and then repeat it as necessary.
- Works across open workbooks and other worksheets.
Cons:
You won’t be able to use this keyboard shortcut to fill the colour since it depends on the previous activity, therefore as soon as you do another action, it won’t work.
[Advanced] Using VBA, Make Your Own Shortcut for Filling Color:
If you frequently need to fill a certain colour in Excel, you may write your own VBA code and install it as an add-in.
Once you’ve done that, you’ll be able to swiftly fill selected cells with colour using straightforward keyboard keys that you designate in the VBA code.
The complete procedures for developing an add-in that uses VBA code and enables you to quickly fill chosen cells with colour are listed below:
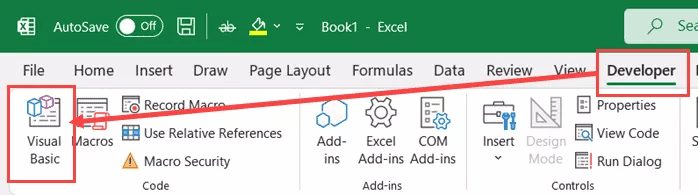
- Open a fresh Excel Workbook
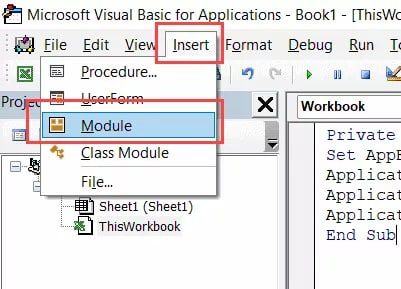
- Select the Visual Basic icon by first selecting the Developer tab. The VBA editor will open as a result. ALT + F11 is a keyboard shortcut you may use to access the Developer tab if it is not shown (or read this guide on how to get the developer tab in the ribbon)
3. Double-click the “This Workbook” item in Project Explorer. If Project Explorer isn’t visible, select “Project Explorer” from the menu’s “View” option.
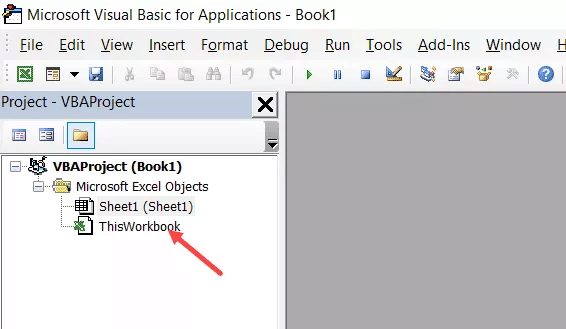
4. Click the “This Workbook” item twice in Project Explorer. To see Project Explorer, select ‘Project Explorer’ from the menu’s ‘View’ option if it isn’t already selected.
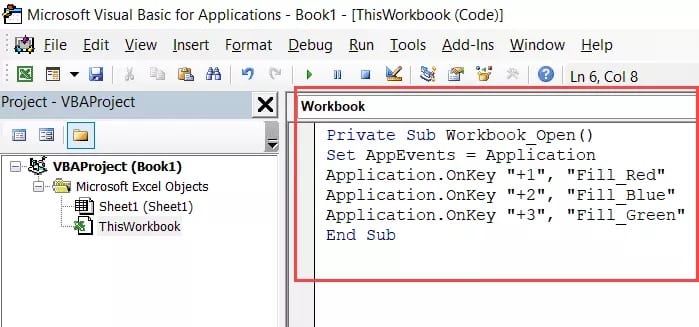
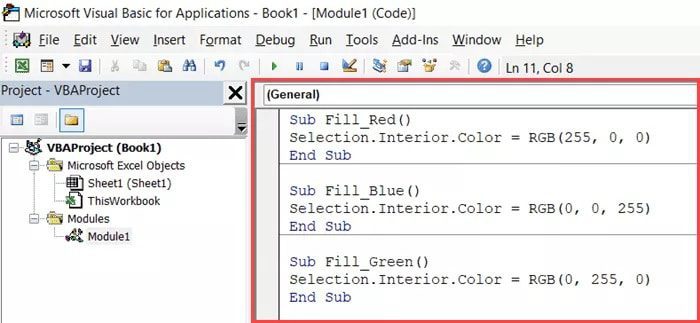
Private Sub Workbook_Open()
Set AppEvents = Application
Application. OnKey "+1", "Fill_Red"
Application. OnKey "+2", "Fill_Blue"
Application. OnKey "+3", "Fill_Green"
End Sub
6. The module code window with the following code copied and pasted.
Sub Fill_Red()
Selection.Interior.Color = RGB(255, 0, 0)
End Sub

Sub Fill_Blue()
Selection.Interior.Color = RGB(0, 0, 255)
End Sub

Sub Fill_Green()
Selection.Interior.Color = RGB(0, 255, 0)
End Sub
7. Shut off the VB editor.
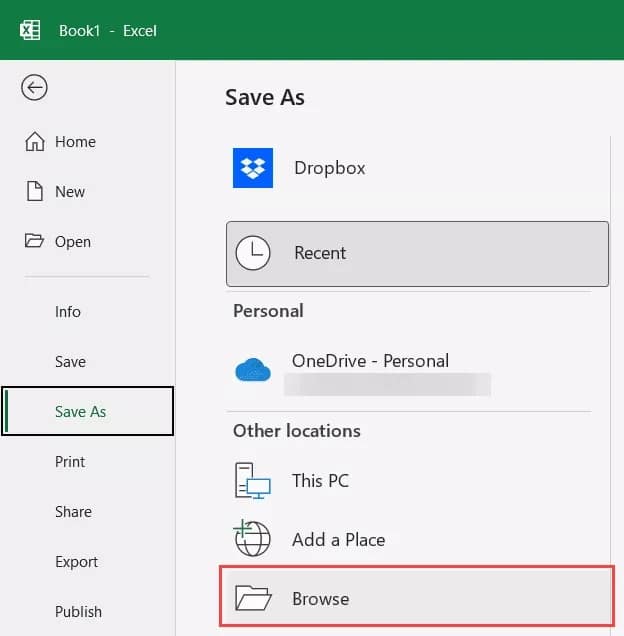
8. Select the File tab, then select Save As.
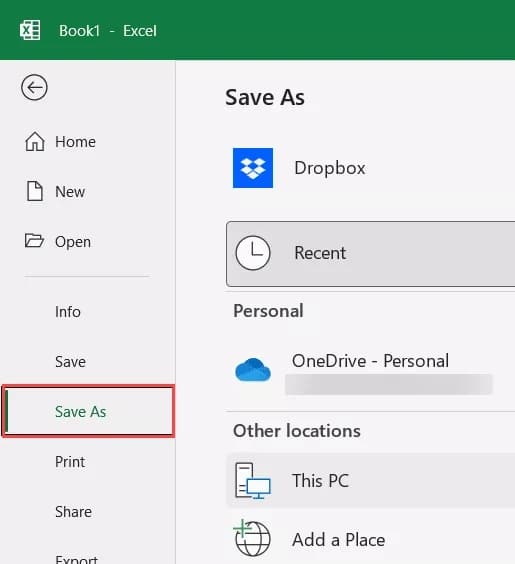
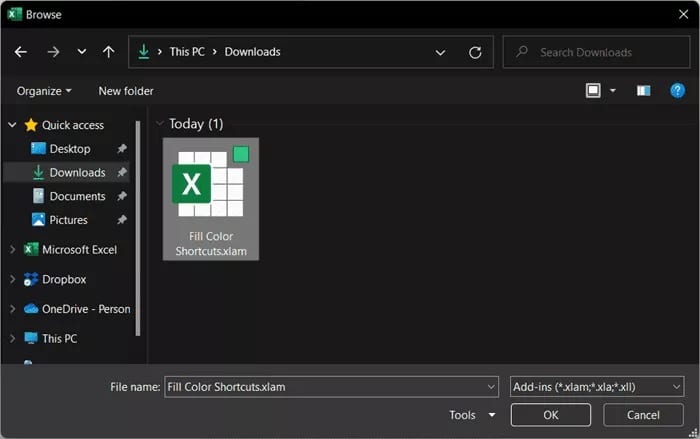
9. Choose the place where you wish to save the add-in by clicking on the Browse option.
10. Give a title on the Add-in.
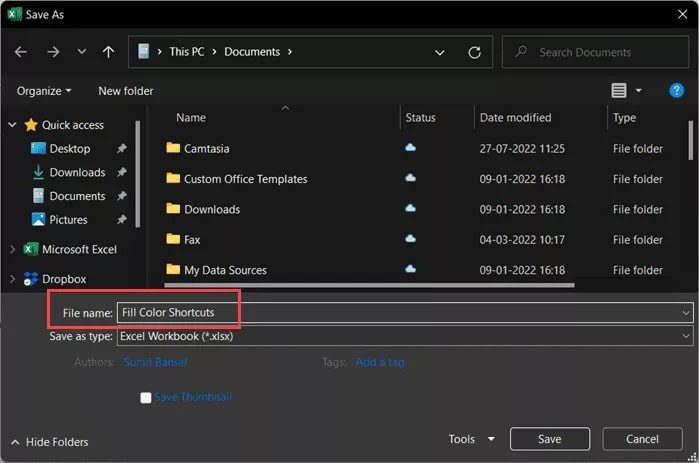
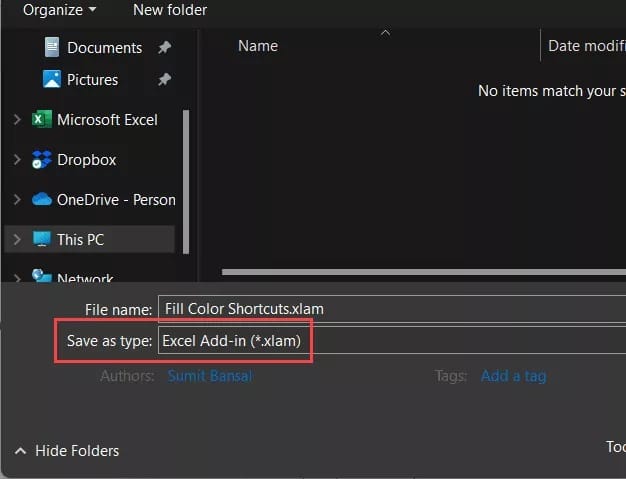
11. Choose the Excel add-in (.XLAM) option from the drop-down menu for “Save as type.”
10. Select “Save”
By following the steps above, we have created an add-in that we can use to install in any Excel workbook and make the VBA code accessible throughout all of the workbooks on our system.
The procedures for including this add-in in an Excel worksheet are as follows:
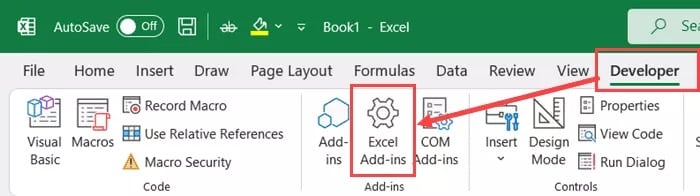
- Open a fresh Excel document (you can also use any existing workbook that is already open)
- Toggle to the Developer tab.
- Click Excel Add-ins in the Add-ins category.
4. Select “Browse” from the Add-ins dialogue box’s buttons.
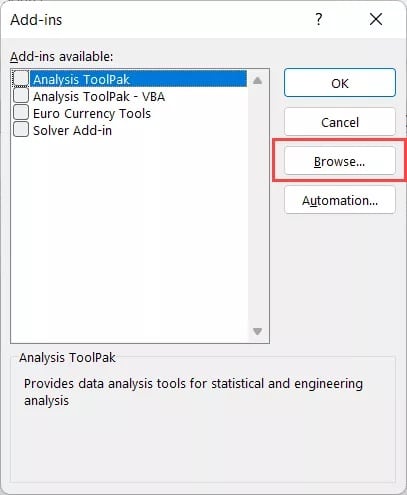
5. Find the add-in that we previously built and saved, then choose it.
6. Press “OK”
7. In the Add-ins dialogue box, click OK (make sure the add-in you added is checked)
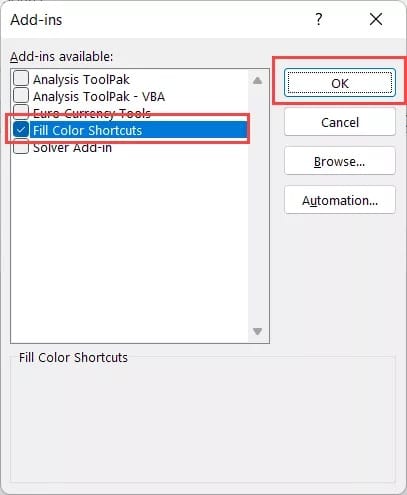
The add-in we generated has been added to the Excel worksheet using the aforementioned methods. As time goes on, this add-in will be accessible in any Excel workbooks you use on your computer (new as well as existing)
You may now fill selected Excel cells with colour using the keyboard keys shown below.
Color red to fill in:
Shift + 1
Color blue to fill:
Shift + 2
To fill the color green:
Shift + 3
In this example, I’ve demonstrated how to set up a few keyboard shortcuts that you can use to fill the selected cells with the colours red, blue, or green.
To choose a different color and even add extra keyboard shortcuts, you may edit the VBA code.
I've shown you how to set up a few keyboard shortcuts in this example so
you can use them to fill the selected cells with the colors red, blue, or green.
You may alter the VBA code to select a new color and even add more keyboard shortcuts.
Pros:
- once set up, simple to use
- Once the add-in is installed, you may make your own shortcuts and use them in any worksheet.
Cons
- For inexperienced Excel users, the initial setup is time-consuming and rather complex.
- Add-ins can occasionally cause problems and clash with other add-ins or with already-existing Excel capabilities.
How to Quickly Copy and Fill Colors in Paint Format:
Excel also gives you the option of simply copying and pasting the formatting from one cell (or a range of cells) to another cell.
The Format Painter tool makes this simple to implement.
Additionally, since the cell’s colour is a component of the formatting, you can use this to rapidly duplicate any cell’s colour and apply it to other cells.
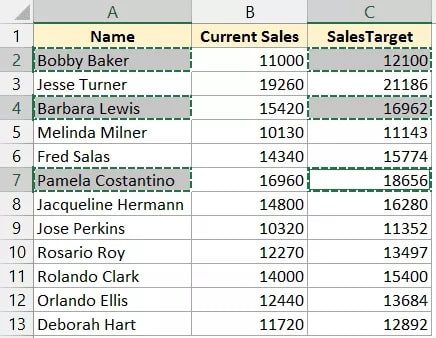
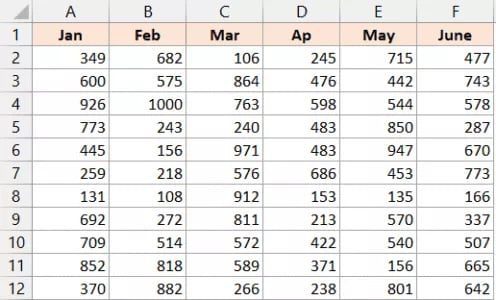
In the data set below, some of the headers that carry the month name have cell colours; I need to fill in the same colour in the other headers that do not.
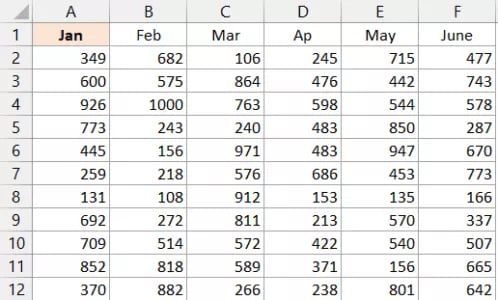
Instead of manually filling the headers in cells D1, E1, and F1 with the same colour, I may duplicate the colour from the coloured cell and then apply it to these blank cells.
The steps to fill colour in Format Painter are as follows:
- Choose the cell that currently contains the colour you wish to replicate.
- On the Home tab, click
- Click the Format Painter icon in the Clipboard group.

4. The cell (or range of cells) that you wish to fill with the same colour should be selected.
Pro tip:
Double-click on the format painter icon in Step 3 if you want to keep using the format painter to fill colour in many cells. The format painter icon can only be used once when you click it once, but when you double click it, it stays active until you press the Escape key or choose another action.
Keep in mind that the format printer option will transfer all of the source cell’s formatting to the destination cell. This may contain conditional formatting as well as the cell colour, border, font colour, and font size.
Many proficient Excel users will copy the conditional formatting rules from one region and apply them to another part of the spreadsheet using the Format Painter tool.
I’ve demonstrated a few quick ways for you to color-fill Excel cells in this lesson. To utilize it, either add the Fill colour icon to the Quick Access Toolbar or use a keyboard shortcut.
Additionally, you may think about utilizing the VBA approach, which enables you to design your own keyboard shortcuts, if you require certain specific colours to be applied to the selected cells rapidly. These shortcuts may be made available in all of the Excel files on your system by creating an add-in with the help of VBA code.
I hope you learned something from this Excel tutorial.