Excel: How to Remove Time from a Date or Timestamp (4 Easy Ways)
You may show data in Excel in a variety of ways. And when it comes to dates and time data in Excel, there are just too many options.
There are also techniques to tweak and adapt these formats because there are so many of them.
Excel users frequently need to subtract time from dates, which is a regular task (i.e., remove the time from the time stamp so that you only have the date).
Here’s an illustration where Column B simply has the date value and Column A contains timestamps that include both the date and the time.
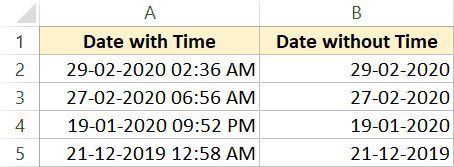
I’ll demonstrate a few techniques in this article for taking the time out of dates in Excel.
Before I get into the procedures, I should point to you that Excel stores date and time as numbers.
Although the date January 1, 2020, can appear, the actual backend value is 43831.
Time is similarly represented by numbers. For example, January 01, 2010, 3:00 PM is the number 43831.63 in the backend
(where the integer part represents the date and the decimal part represents the time).
This instruction explains:
1. Modify the format to remove the timestamp from the time.
2. Using Excel formulas, remove time from dates
2.1 Implementing the INT Formula
2.2 Using the formula for DATE VALUE
3. Using Find and Replace, remove the time from the date.
4. Using Text to Columns, remove the time from the date.
1. Modify the format to remove the timestamp from the time.
By changing the format of the cells in Excel, you may quickly display only the date and not the date and time.
This implies that concealing the time portion of the time stamp does not truly remove the time from the time stamp.
The example below shows two cells with identical date values, but because they are structured differently, you can see the time in only one of them.
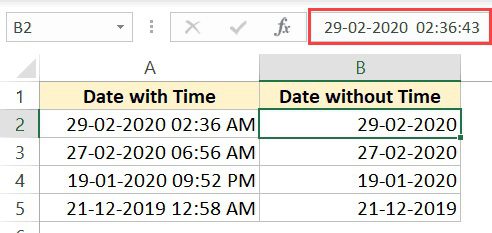
As you can see in the figure above, the cell just displays the date whereas the formula bar displays both the date and time.
The procedures for modifying the cell formatting to remove/hide the time from the date are as follows:
- Choose the cell from where the time stamp is located that you want to delete the time.
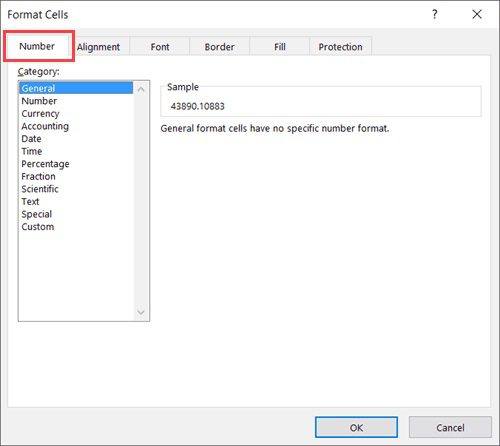
- Press the 1 key while keeping the Control key depressed. With this, the Format Cells dialogue box will appear.
- the Number tab in the Format Cells dialogue box.
- Select the Date option in the left pane.
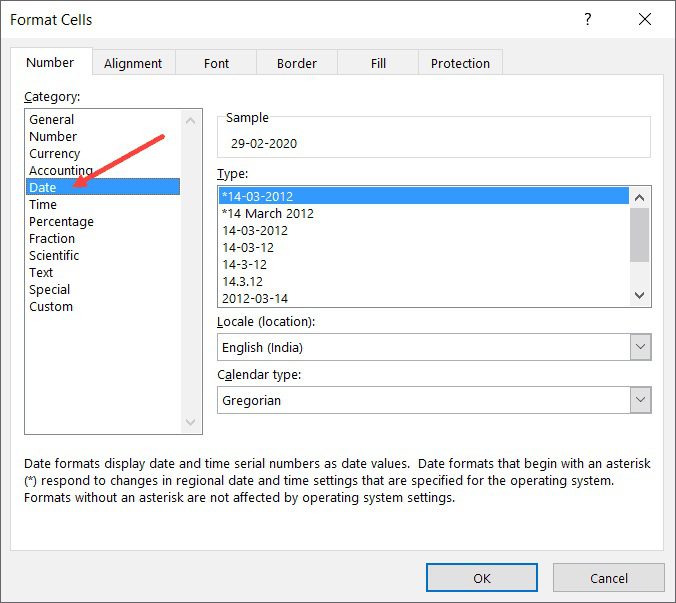
- Choose the format in which you want the date to be presented from the options on the right.
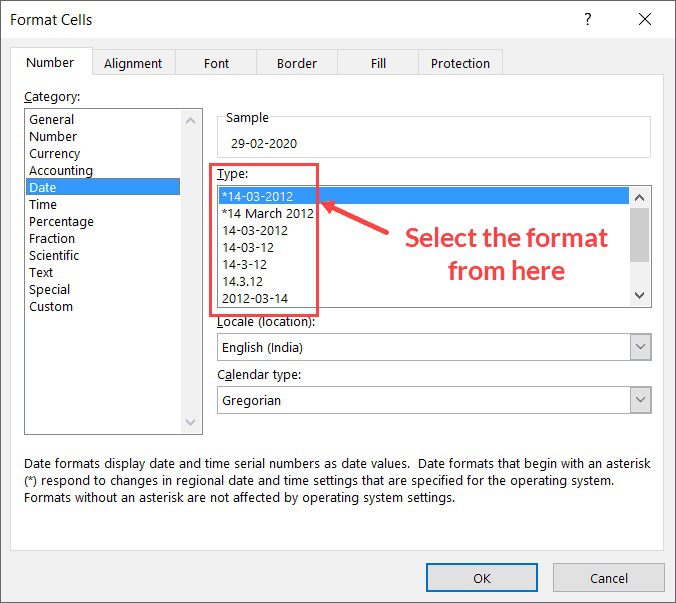
- OK
By following the preceding instructions, the time component of the time stamp is immediately hidden, leaving only the date visible.
Keep in mind that this strategy simply conceals the time component; it does not eliminate it. This indicates that the date and time values would be included in any computations made using these fields.
There are two advantages to this approach:
- The result may be obtained without using a separate column. Simply pick the data-containing cells and alter the format only for those cells.
- It just modifies how the value is displayed; the original value is unaffected. So you still have the original data if you need to utilize it.
Use the formula approach (discussed below), the Find and Replace method, or the Text to Columns method if you wish to eliminate the time component from the time stamp (covered after that)
2. Using Excel formulas, remove time from dates
There are a few simple formulas you can use to extract the date section of a time stamp without the time component.
I’ll demonstrate how to achieve this in this section using three Excel formulas: INT, DATEVALUE, and TEXT.
2.1 Implementing the INT Formula
Let’s say you want to simply have the date section of the cells in the dataset below, removing the time portion from each one.
The INT formula for doing this is listed below:
=INT(A2)

The aforementioned formula subtracts the decimal component from the cell value and only returns the integer portion. In Excel, times are recorded as fractional/decimal numbers but dates are kept as integer values, thus if you eliminate the decimal component, all that is left is the date portion.
However, the time component (12:00 AM) is still visible in the outcome. the reason why
That is a result of the cell’s format, which compels it to display both the date and the time. Additionally, because the time value is 0, all of the cells display 12:00 AM.
Therefore, you will need to modify the format such that it just displays the date and not the time to hide the time component.
The steps to just display the date and not the time in Excel is as follows:
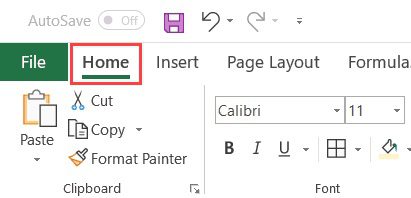
On the Home tab, click
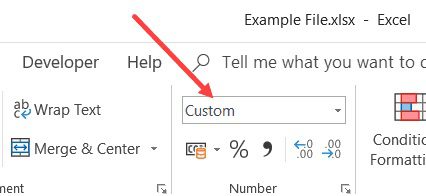
Click the drop-down menu next to the Number group.
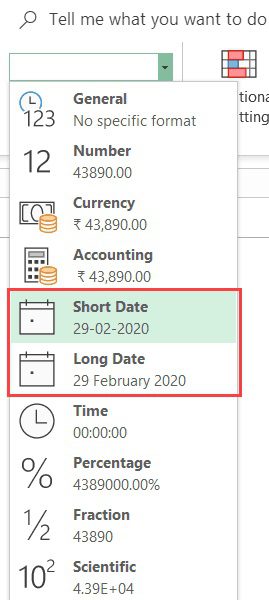
Depending on how you want the date to be presented, choose a Short date (or Long Date).
I’m done now!
The time has been successfully deleted from the date.
Keep in mind that by removing the decimal component from the number using this technique, you have truly modified it. This approach differs from the one we previously discussed (where we simply changed the format to hide the time portion).
Let’s look at another Excel formula to do this now.
2.2 Using the formula for DATE VALUE
The DATEVALUE function has one job: to provide you with the value of the date from a time stamp. The INT formula takes the integer part and discards the decimal part (which is the time section).
As a result, if I enter the value as 02:36:43 on February 29, 2020, it will only return the value for the date.
The syntax of the DATEVALUE formula is as follows:
=DATEVALUE(date_text)
DATEVALUE only accepts one parameter, and that argument must be the date in text format. This indicates that if I enter the date directly or the cell containing the date, an error will result.
The date must be in text format, I must be sure. Therefore, to obtain the result, I must mix the TEXT and DATEVALUE functions.
The equation to subtract the time from the date is shown below:
=DATEVALUE(TEXT(A2,"dd-mm-yyyy"))
The TEXT function is used in the formula above to convert the date into the desired text format. The DATEVALUE function uses this to return only the date portion of the time stamp.
The outcome will appear as a number, which is the date’s numeric value. The following formula may be used, or you can manually alter the format of the result to a short/long date:
=TEXT(DATEVALUE(TEXT(A2,”dd-mm-yyyy”)),”dd-mm-yyyy”)
 The DATEVALUE result is wrapped in the TEXT formula and the format is set to “dd-mm-yyyy” in the formula above. You don’t have to worry about the format because this would output the result as a text value.
3. Using Find and Replace, remove the time from the date.
Use the search and replace feature to rapidly remove the time component if your time stamp data has the format shown below.
Let’s say you want to merely have the date and you have the dataset that is depicted below.
The steps to removing time from a date using Find and Replace are as follows:
- Decide which cells you want to subtract the time from.
- On the Home tab, click
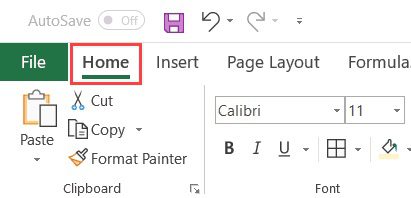
- Select the Find and Select option under the Editing group.
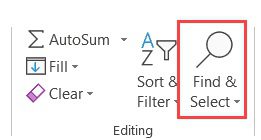
- Select the Find and Select option under the Editing group.
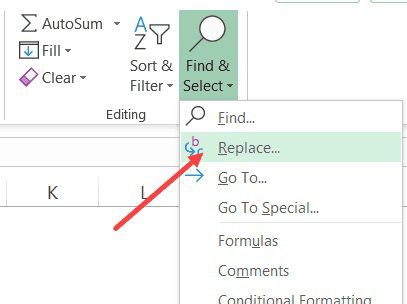
- Select Replace by clicking. This will open the ‘Find and Replace dialogue box
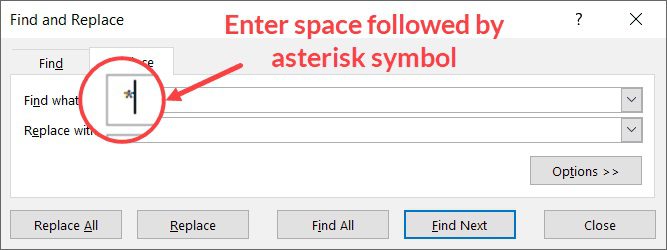
- Select Replace by clicking. This will open the ‘Find and Replace dialogue box
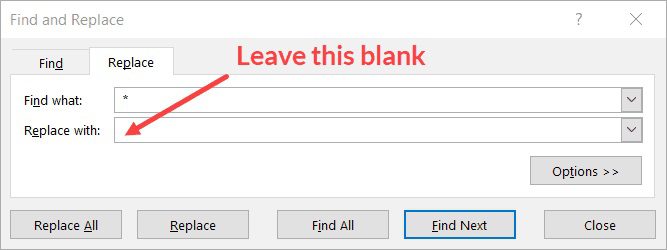
- Replace All
The time component of the cell would be quickly removed by the aforementioned processes, leaving you with simply the date.
However, you could still see the outcome as displayed below, where the date also includes the time component (although all the time value is 12:00 AM).
This occurs because although we have removed the time component from the overall date, the format has not yet been modified to solely display the date.
The data must be in a format where the date is followed by a space character, then the time, for this to work. This approach won’t work if you have leading spaces. You must eliminate leading spaces before using this technique.
The data must be in a format where the date is followed by a space character, then the time, for this to work. This approach won’t work if you have leading spaces. You must eliminate leading spaces before using this technique.
The procedures to just obtain the date and hide the time are as follows:
- On the Home tab, click
- Click the drop-down menu next to the Number group.
- Depending on how you want the date to be presented, choose a Short date (or Long Date).
You don’t require an additional column to obtain the output when using Find and Replace as opposed to formulae. The findings can be stored in the same cells as the original data. Just be sure to make a backup copy in case you ever need to access the original data.
4. Using Text to Columns, remove the time from the date.
Text in a cell can be divided primarily using Text to Columns.
And I’ll use it in this example to separate the date and time components of the time stamp. When I’m through, all that will be left is the date, which I may format as I choose to display the date.
Assume you have the dataset as follows:
The procedures for using Text to Columns to eliminate the time component from the date are as follows:
- Decide which cells you want to subtract the time from.
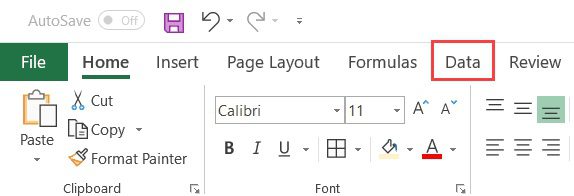
- Go to the Data tab.
- Click the “Text to Columns” option under the Data Tools category.

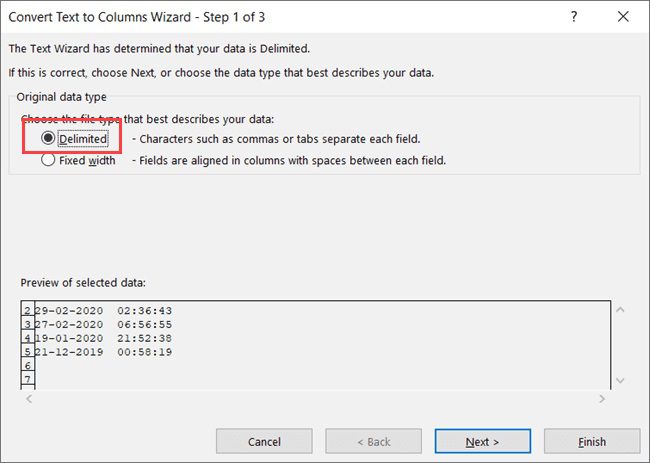
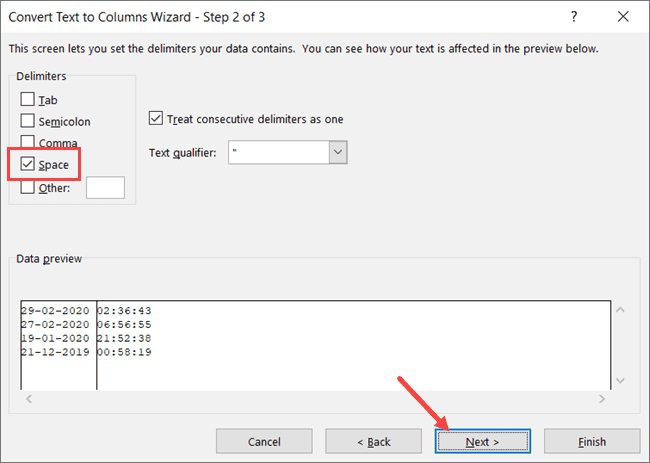
- Follow these steps in the Text to Column Wizard:
- Choose “Delimited” in the first of three steps.
 Choose “Space” as the delimiter in Step 2 of 3.
- Step 3 of 3: Click the column that contains the time values in the Data preview section, and then choose the ‘Do not import column (skip)’ option. Keep the destination cell where the data is in the same.
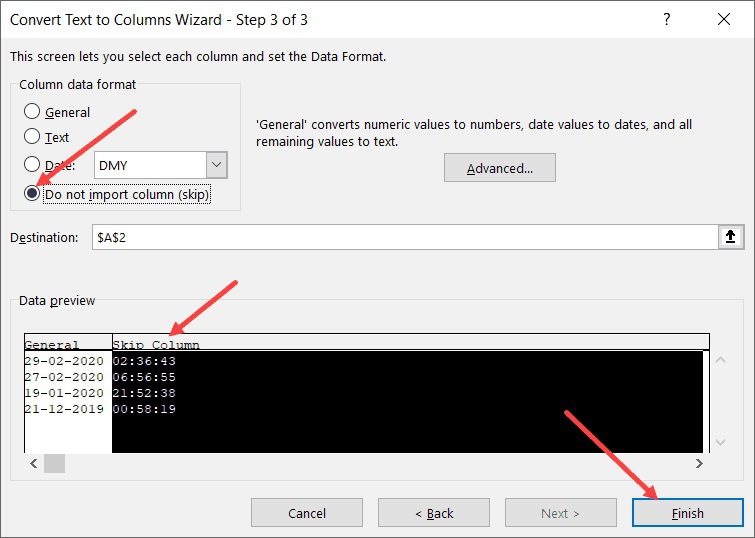
- Finish
The preceding procedures will eliminate the time part from the cells, leaving only the date.
You will, however, see the time for each date (where the time will be midnight or something similar). This is because the cell format still requires time to be displayed.
The following are the procedures to modify the format such that it simply displays the date:
- Select the Home tab.
- Click the drop-down menu in the Number group.
- Choose a Short Date (or Long Date) depending on how you want the date displayed.
You may alternatively receive the generated data in individual cells using Text to Columns (and keep the original data as is). In Step 3 of the Text to Columns wizard, you must specify the target cell.
These are several quick and easy methods for removing time from a date in Excel. The approach you pick will be determined by whether or not you wish to maintain the original data. When you use formulae, the result is displayed in a different column, while when you alter the format or use Find and Replace or Text to Columns, the result is displayed in the same cells.

MS excel VBA
ms excel vba
Hellow,Moderator, Excellent post, very informative.