How to choose cells that are not similar in Excel? (4 Simple Steps)
Using a mouse, click on a cell, then drag to cover all the cells you wish to pick is the simplest method for selecting a block of cells.
Alternatively, if you prefer using a keyboard, you may choose an option while holding down the shift key.
However, both of these techniques are effective when you wish to pick a group of cells that are close together.
But what if you want to choose cells that are not adjacent in Excel?
You may also do that. It’s not quite as simple as choosing the cells next to each other, but it’s still simple.
In this Excel article, I’ll walk you through a few quick strategies to choose cells that are not neighboring.
Then let’s get going!
This instruction explains:

1. Using the Keyboard and Mouse
2 Using Just the Keyboard
3. The Name Box's Use
4. Finding and replacing
1. Choosing Non-Adjacent/ Using the Keyboard and Mouse
The mouse is the most convenient tool for choosing non-adjacent ranges (along with the keyboard).
How to choose two non-adjacent ranges of cells is shown below:
- To choose the first cell, simply click on it. The active cell will now be this one.
- Keep the Control key down on your keyboard.
- To choose, utiliseutilize the mouse’s left click and dragging motion.
- Do not click the mouse. You would have a choice at this point. Keep pressing the Control key.
- The second cell or range that you wish to choose should have the pointer there.
- To choose, utilize the mouse’s left click and dragging motion.
- Do not click the mouse. Two non-contiguous ranges of cells would be chosen in this way.
- Release the Control key

Keep pressing the control key while making your selections if you wish to choose out more than two non-adjacent cell ranges.
2. Choosing Non-Adjacent/Using Just the Keyboard
Although the aforementioned technique (using a combination of the keyboard and mouse) is the most effective, you may also choose to solely use the keyboard to pick cells that are not neighboring.
The steps to choosing distant cells on a keyboard are as follows:
- The initial cell you wish to choose should have the cursor placed there. This is currently the cell that is in use.
- F8 is pressed. Your system will enter the “Extend Selection” mode as a result. That is also indicated in the Status bar.

- The choice is made by using the arrow keys. This will maintain a selection of all the nearby cells because you are in the Extend Selection mode.
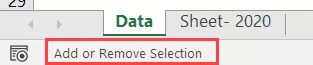
- F8 while holding down the Shift key. By doing this, the ‘Extend Selection’ mode is eliminated and replaced with ‘Add or Remove Selection.
- The next cell you wish to include in the selection should have the pointer placed there using the arrow keys.
- Once more, press the F8 key.
- The choice is made by using the arrow keys.
- F8 while holding down the Shift key. This removes the ‘Extend Selection’ mode.
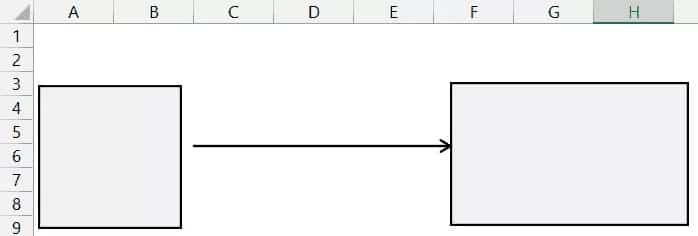
The aforementioned procedures would pick two distant cells or ranges.
Repeat the process if you wish to choose more such ranges. Here is an example of how it might operate:
![]()
3. Choosing Non-Adjacent/ The Name Box’s Use
There are occasions when you must choose particular cells that are dispersed and distant.
In this situation, you may also choose non-adjacent cells in Excel by using the Name Box.
Excel VBA
The Name Box is always displayed alongside the formula bar and is located directly next to it (to its left). Therefore, it will be quicker to enter the cell reference in the name box and press the enter key if you already know the cells you want to choose.
Consider the following cells, for instance: A1, C12, D20, and K14.
The Name Box may be used to choose these non-adjacent cells as shown below:
- On the Name Box, click. The name box will now have the pointer there.
- Put the various cells or ranges that you wish to pick in there (separated by a comma when selecting multiple ranges)
- Enter the word.

All the cells that were specified would be instantaneously selected.
Note that while using Name Box, the cell that was most recently defined becomes the active cell.
Additionally, you may choose non-adjacent ranges using the name box.
Excel VBA
Use this in the Name Box, for instance, if you wish to choose the three ranges A1:A20, C1:C20, and F1:F20.
When you have named ranges, utilizing the Name Box to make a selection works quite well. Assume, for instance, that you have ranges named Data1, Data2, and Data3. Simply create a named range and enter it in the Name Box to avoid having to memorize the ranges.
4. Choosing Non-Adjacent/ Finding and replacing
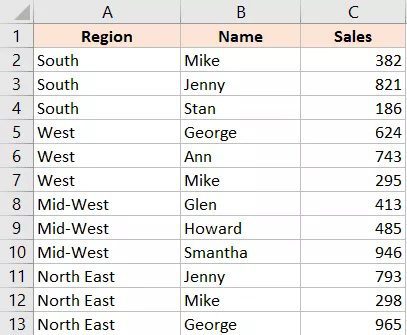
You might occasionally wish to choose cells depending on the value contained inside.
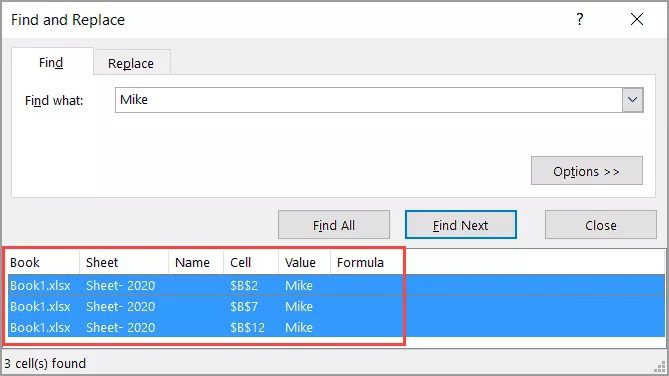
For instance, you could wish to choose all the cells with the name “Mike” if you have the sales data for many Sales Reps.
Although you can do this manually, it works better to utilize Find and Replace when dealing with a big dataset.
The procedures for choosing non-adjacent cells using Find and Replace are listed below:
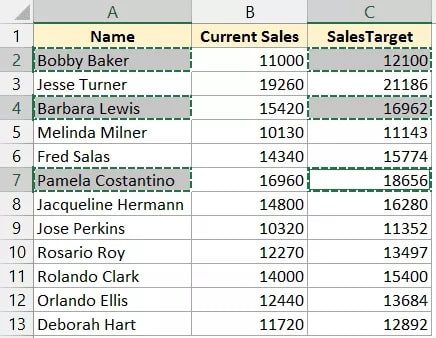
- Choose the complete data set.
- Press the F key while holding down the Control key (or Command + F on a Mac).
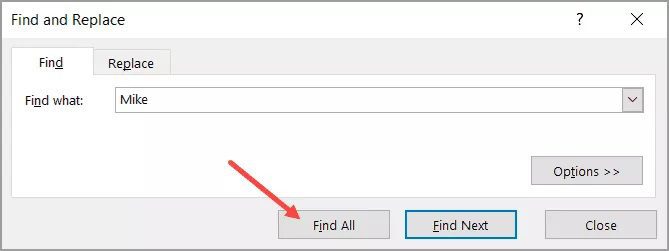
- Enter Mike in the “Find what” area of the Find and Replace dialogue box that appears.
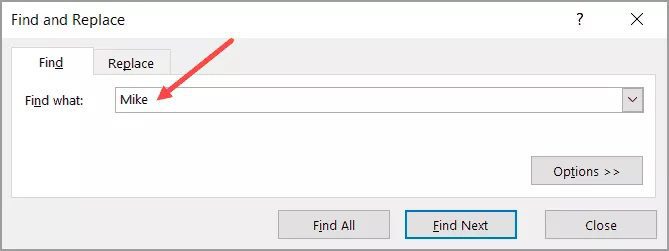
- Select “Find All” from the menu. This will locate every cell that has the name “Mike.”
- While holding down the Control key, hit the A key. This will choose each of the discovered cells.
- The Find and Replace dialogue box should be closed.
The aforementioned actions would pick every cell containing the sought text.

You may edit, alter, or format these now that you have all of them chosen.
Pro tip: Enter the value in the active cell and press Control + Enter to make any changes to the cell values of the chosen non-contiguous cells and have them displayed in all the cells.
For instance, if you wish to convert Mike to Michael, first apply the methods above to select every cell that has Mike in it. Once it has been chosen, type Michael (which will just enter the name in the current cell) and then hit Enter while holding down the Control key.
Excel VBA
This will guarantee that identical text is inserted in each of the chosen cells.
This method may be used to enter text, values, and formulae.
This is frequently used when you want to rapidly locate and pick all the blank cells and replace them with zeros.