Skip to content
 How to Remove Excel’s Hidden Rows and Columns
When Excel users have certain data that they don’t need to be visible, they frequently conceal rows and columns.
It allows you to keep only the information that is necessarily displayed while avoiding having to remove the information that is not required.
Furthermore, finding and deleting these hidden rows and columns (if you don’t need them) may be difficult if you have a lot of them.
I’ll demonstrate a few methods in this article for quickly deleting hidden rows and columns in Excel.
You may use VBA macro codes if you want to apply this to our chosen range of cells, but there is an inherent way that lets you remove all concealed rows and columns at once.
This instruction explains: 1. Remove Excel's hidden rows and columns. 2. VBA may be used to remove hidden rows and columns. 2.1 Using the Whole Worksheet (Used Range) 2.2 A Particular Range of Cells
1. Remove Excel hidden rows and columns.
The technique described here may be used to remove all of the hidden rows and columns from a worksheet in Excel.
Keep in mind that the whole workbook, not just the current page, will have these hidden rows and columns removed.
The Excel workbook’s hidden rows and columns can be removed by following the methods listed below:
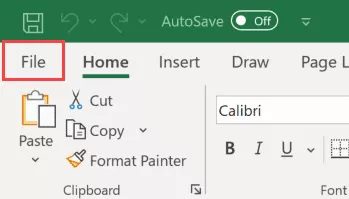
- Select File from the menu.
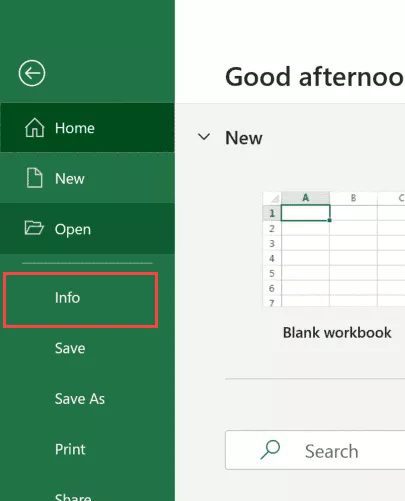
- Select “Info” from the menu on the left.
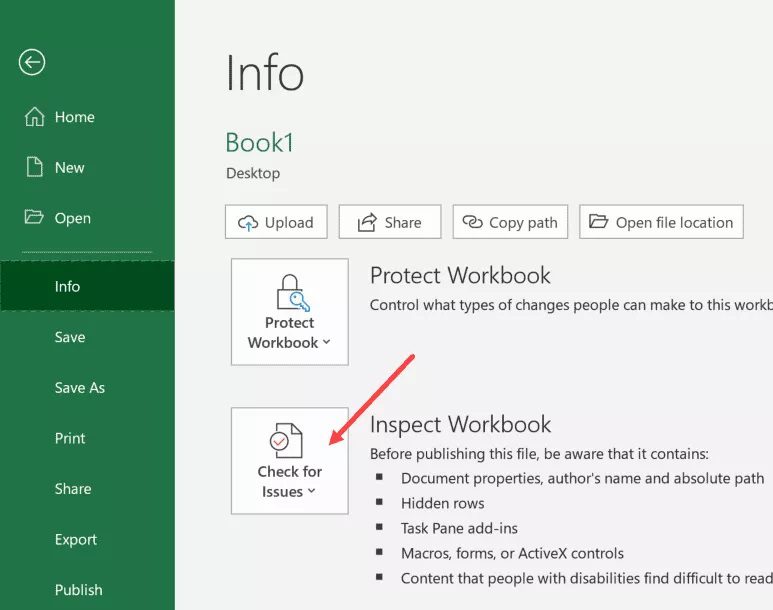
- Select “Check for Issues” from the menu.
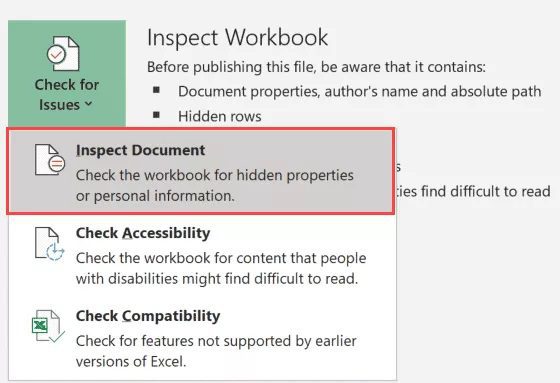
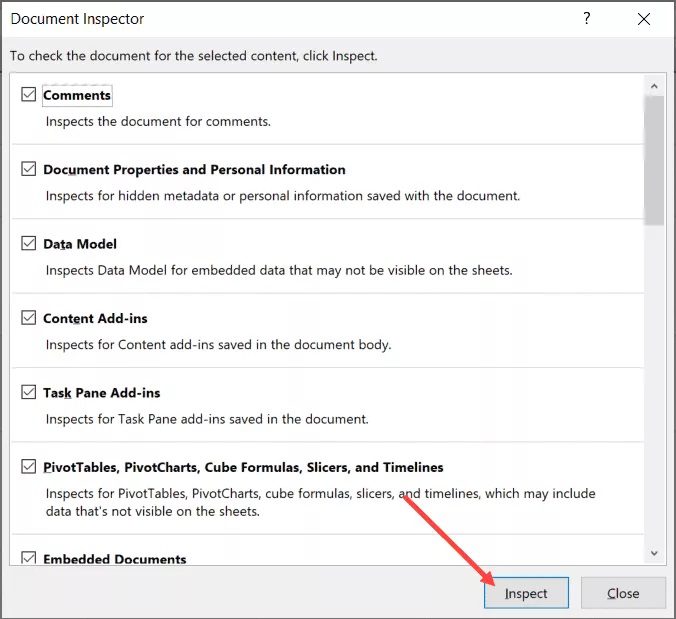
- Select “Inspect Document” from the menu. The Document Inspector dialogue box will open as a result.
- Click the “Inspect” button in the “Document Inspector” dialogue box. This will look through the entire worksheet and provide you with details about it.
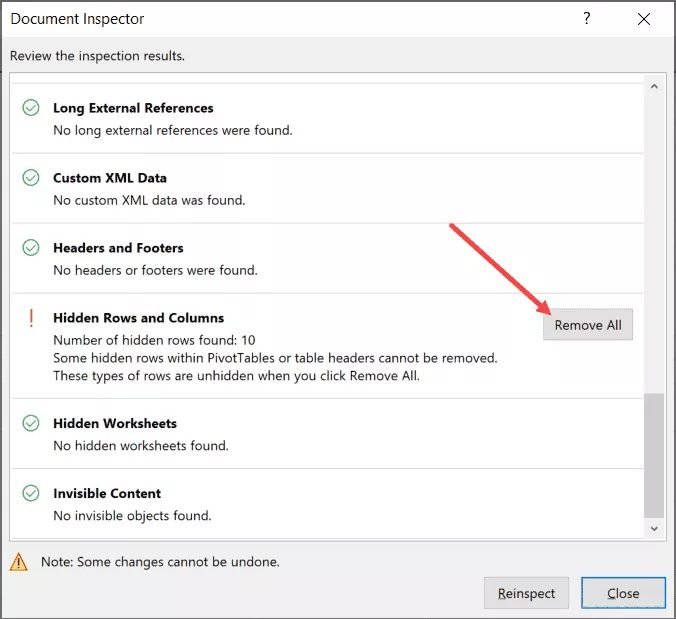
- To access the “Hidden Rows and Columns” option, scroll down. You’ll observe that it displays the overall number of hidden columns and rows it has uncovered in the worksheet.
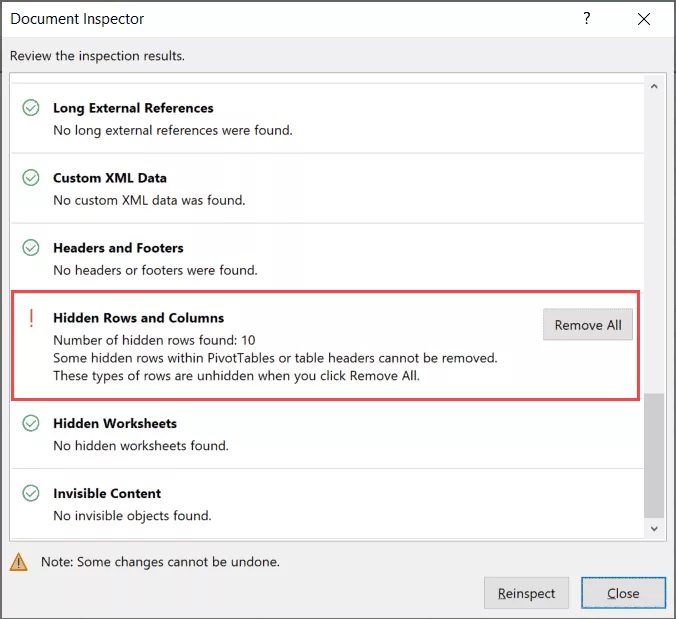
- Select “Remove All” from the menu.

All the hidden rows and columns in the worksheet would be deleted by the aforementioned methods.
Before using the Document Inspector option, keep in mind that you must save this worksheet. If the worksheet hasn’t been saved yet, Excel will initially compel you to do so. Additionally, a popup requiring you to save the file once will appear, as the data altered by these actions cannot be reversed.

You would notice a green check before the Hidden and Rows and Columns option if there were no hidden rows and columns (in the Document Inspector dialogue box).
The Document Inspector dialogue box also provides you with a wealth of additional helpful information, like as the number of comments, hidden worksheets, embedded documents, etc., in addition to hidden rows and columns.
Note:
The modifications performed by the Document Inspector are irreversible. As a result, be sure to keep a duplicate of the original data on backup (in case you may need it in the future)
If you wish to remove all of the workbook’s hidden columns and rows, this is a perfect technique.
You cannot utilize this option, though, if all you want to do is remove it from a certain sheet or a specified range.
If so, you can employ the VBA technique that is discussed next.
2. VBA may be used to remove hidden rows and columns.
You can manually unhide the few rows and columns that are concealed before deleting the data if there aren’t many.
However, it’s recommended to utilize VBA macro scripts to automate this procedure if you need to do it frequently or if you have a huge data collection with a lot of hidden rows and columns.
Let’s examine several situations when you can erase these concealed rows and columns using VBA.
2.1 Using the Whole Worksheet (Used Range)
Even if I could instruct the VBA code to examine the whole worksheet beginning with the final row and column numbers, it would be a waste of time and resources.
A better approach would be to identify the utilized range before just checking it for any concealed columns and rows.
The VBA code that will eliminate every hidden row in the selected range is shown below:
Sub DeleteHiddenRows()
Dim sht As Worksheet
Dim LastRow
Set sht = ActiveSheet
LastRow = sht.UsedRange.Rows(sht.UsedRange.Rows.Count).Row

For i = LastRow To 1 Step -1
If Rows(i).Hidden = True Then Rows(i).EntireRow.Delete
Next

End Sub
Before assigning the row number to the variable “LastRow,” the aforementioned VBA code first determines the last row number in the used range.
Then, starting with the last row and determining whether it is concealed or not, the last row number is utilised in a for-next loop.
That entire row gets removed just in case it was concealed. If it is not concealed, the code leaves that row in place before moving to the row above it. This loop searches over every row and eliminates any hidden rows it finds.
Use the VBA code below if you wish to remove all the hidden columns from the currently selected range.
Sub DeleteHiddenColumns()
Dim sht As Worksheet
Dim LastCol as Integer
Set sht = ActiveSheet
LastCol = sht.UsedRange.Columns(sht.UsedRange.Columns.Count).Column

For i = LastCol To 1 Step -1
If Columns(i).Hidden = True Then Columns(i).EntireColumn.Delete
Next

End Sub
Again, this operates in the same manner, except that we are looking for columns rather than rows.
To delete all concealed columns, it first determines the final column number in the utilised range, assigns it to a variable, and then uses the loop to go from the last column to the first column.
Use the VBA code below if you’d want to have a code that will remove all concealed rows and columns:
Sub DeleteHiddenRowsColumns()
Dim sht As Worksheet
Dim LastRow as Integer
Dim LastCol as Integer
Set sht = ActiveSheet
LastRow = sht.UsedRange.Rows(sht.UsedRange.Rows.Count).Row
LastCol = sht.UsedRange.Columns(sht.UsedRange.Columns.Count).Column

For i = LastRow To 1 Step -1
If Rows(i).Hidden = True Then Rows(i).EntireRow.Delete
Next

For i = LastCol To 1 Step -1
If Columns(i).Hidden = True Then Columns(i).EntireColumn.Delete
Next

End Sub
Simply the combined code that applies to both rows and columns, it functions in the same way.
This utilises two independent loops in instead of one, first iterating through all the rows, then all the columns. Additionally, as it goes along, it eliminates any hidden columns and rows that it comes across.
Keep in mind that this VBA code must be placed in a standard module in the Visual Basic Editor. Following that, you may execute the code straight from the Visual Basic Editor, using the macro dialogue box, or by adding this macro to the fast access toolbar.
You may also add this code to the personal macro worksheet if you need to do it frequently so that you can access it from any workbook on your system.
2.2 A Particular Range of Cells
If you wish to delete hidden rows and columns from a certain range, you must indicate it in the code.
This ensures that just the rows and columns in the given range are circled by the code, leaving the rest of the worksheet’s sections unaffected.
The VBA code that would cause this is below:
Sub DeleteHiddenRowsColumns()
Dim sht As Worksheet
Dim Rng As Range
Dim LastRow As Integer
Dim RowCount As Integer
Set sht = ActiveSheet
Set Rng = Range("A1:K200")
RowCount = Rng.Rows.Count
LastRow = Rng.Rows(Rng.Rows.Count).Row
ColCount = Rng.Columns.Count
LastCol = Rng.Columns(Rng.Columns.Count).Column

For i = LastRow To LastRow - RowCount Step -1
If Rows(i).Hidden = True Then Rows(i).EntireRow.Delete
Next

For j = LastCol To LastCol - ColCount Step -1
If Columns(j).Hidden = True Then Columns(j).EntireColumn.Delete
Next


End Sub
I have defined the range as A1:K200 in the code above.
This instructs the code to search through every row and every column in the designated range and delete any hidden rows and columns it finds.
Any concealed rows or columns that are outside of this range would be unaffected.
Therefore, here is how you may remove Excel’s hidden rows and columns.
Use the Document Inspector option if you wish to apply it to the whole worksheet. Additionally, you may utilise the VBA codes as previously displayed if you want greater control.