How to Remove Sheets from Excel Using Shortcuts and VBA
When using Excel, the worksheet is where you spend the majority of your time (which is the area that has all the cells and everything that happens there).
Working with numerous worksheets in the same workbook is necessary to use Excel effectively.
Excel makes it simple to add numerous worksheets to a workbook. It also makes it simple to delete worksheets from a workbook.
I’ll demonstrate how to rapidly remove worksheets in Excel in this lesson. I would go through a variety of techniques, including keyboard shortcuts, ribbon choices, and VBA, to remove sheets in Excel.
Note:
I’ll use the terms “sheet” and “worksheet” interchangeably throughout this lesson. To clarify, though, Sheets contain both Worksheets and Chart Sheets, but since Chart Sheets are less prevalent, I always think of a Worksheet when I use the word Sheet.
This instruction explains:
1. Using Right-Click Options, Delete Sheets
2. Shortcuts on the Keyboard to Remove the Worksheets
3. Using VBA, delete the Active Sheet
4. Using VBA, deleting Sheet By Name (If It Exists)
5. Using VBA, delete all sheets other than the active sheet
6. All Sheets having a Particular Text String in the Name Can Be Removed
1. Using Right-Click Options, Delete Sheets
This straightforward two-click mouse approach is the simplest way to erase a worksheet in Excel.
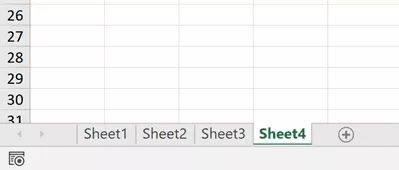
Let’s say you wish to remove Sheet 1 from a worksheet that includes three sheets, as seen below.
This straightforward two-click mouse approach is the simplest way to erase a worksheet in Excel.
Let’s say you wish to remove Sheet 1 from a worksheet that includes three sheets, as seen below.
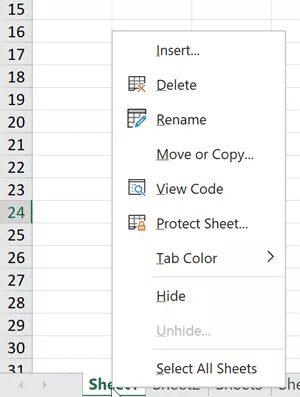
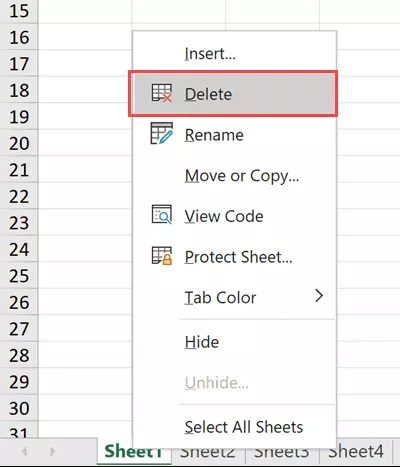
Choose “Delete” from the menu.
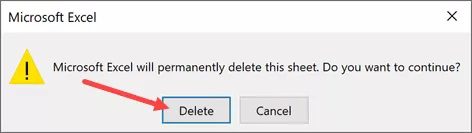
Click the Delete button on the pop-up prompt.
The aforementioned method may likewise be applied to sheets that are not even active. For instance, if I’m on Sheet1 and I want to remove Sheet3, I can do so by just right-clicking Sheet3.
The same method may be used to remove numerous sheets simultaneously.
For instance, if I want to delete Sheets 2 and 3 at once, I may click on each of them individually while holding down the control key (while still holding the control key).
I could choose numerous sheets at once in Excel by using the control key. I may leave the control key after choosing the desired sheets. I may now delete any tab of the chosen sheets by doing a right-click.
In Excel, keep in mind that you cannot remove every worksheet in a workbook. The workbook must always have at least one sheet. You will receive a popup that informs you that you are not permitted to delete all the worksheets (or the sole active sheet) if you attempt to do so.
2. Shortcuts on the Keyboard to Remove the Worksheets
You have not one, but two and a half keyboard shortcuts available in Excel for deleting worksheets.
I say two and a half because he utilizes both the mouse and the keyboard for one of the shortcuts (and is still a faster way to do it)
Hybrid Shortcut on the Keyboard to Delete a Sheet
Right-Click + D
Right-click the worksheet or worksheets you want to remove, then press the D key on your keyboard.
For me, this is a lot quicker than simply deleting a spreadsheet with the mouse (as I covered in the above section)
Shortcut on the Standard Keyboard to Delete a Sheet
ALT + H + D + S
The aforementioned keyboard shortcut will remove the active sheet or the chosen sheets if you’d rather solely use the keyboard instead of the mouse.
You must sequentially tap these keys (i.e., one after the other)
Once you become used to it, it appears to be a little longer keyboard shortcut, but it is equally as quick as any other approach presented in this article.
Worksheet Deleting Shortcut on the Old Keyboard
Excel has a past, just like everyone else, and it’s not a good one. I’m talking about the pre-ribbon style era.
Some of those outdated keyboard shortcuts for Excel are still functional in the more recent versions for compatibility reasons. These earlier shortcuts are frequently quicker and more effective.
Fortunately, Excel has a legacy keyboard shortcut that may be used to remove workbooks.
ALT + E + L
3. Using VBA, delete the Active Sheet
It is preferable to utilize the aforementioned techniques to delete a single worksheet or a few worksheets.
Although VBA may automate the procedure, its value is only seen when you need to repeat the action repeatedly.
As you’ll see, there are a lot more options available when removing worksheets in Excel using VBA.
I’ll now take you to more complex use cases, but first, let’s look at how to quickly erase the currently active worksheet using VBA.
The VBA code to remove the active sheet is provided below:
Sub DeleteSheet()
ActiveSheet.Delete
End Sub
You may just use the line below if you’re using it in the current window:
ActiveSheet.Delete
When you use the aforementioned code to remove the active sheet, Excel will display a prompt and need you to confirm the deletion by clicking the delete button.
Not Displaying the Confirmation Prompt When Erasing the Sheet
If you execute the code accidentally or mistakenly, the confirmation prompt message box is a helpful feature that ensures you have a chance to stop the deletion of the sheet.
But receiving this prompt might be extremely inconvenient if you already know what you’re doing.
To ensure that the sheets are erased without a confirmation prompt message box, below is the VBA code.
Sub DeleteSheet()
Application.DisplayAlerts = False
ActiveSheet.Delete
Application.DisplayAlerts = True
End Sub
The Application. The display Alerts property in the code above is set to false, so Excel won’t show you any display alerts while the code is executing.
To restore functionality, it’s also crucial to make sure that you set it back to true after the code (as you can see I have done in the above code).
Attention: If you set Excel’s Application. Display Alerts value to false, the worksheet will be automatically deleted and cannot be recovered. Therefore, before using this sort of code, I encourage you to create a backup copy.
4. Using VBA, deleting Sheet By Name (If It Exists)
Based on the sheet name, VBA enables you to automate the process of removing a particular worksheet (on many worksheets).
You may use the code below to remove a worksheet, for instance, if its name is “Sales”:
Sub DeleteSheetByName()
Sheets("Sales").Delete
End Sub
Only the Sales sheet would be deleted by this code.
When you have a workbook with several sheets and don’t want to manually go through each worksheet to identify the one with the term sales, it might be helpful.
No matter how many worksheets are present in the workbook, the aforementioned code would just remove the sales worksheet.
You will receive a message asking you to validate the length of the sales sheet by clicking the delete button because I did not alter the Application.DisplayAlert property.
You may also remove numerous sheets depending on their names if you wish to.
For instance, the code below would eliminate the sales, marketing, and finance sheets:
Sub DeleteSheetsByName()
Sheets("Sales").Delete
Sheets("Marketing").Delete
Sheets("Finance").Delete
End Sub
VBA is one of the better ways to accomplish this if you have a workbook with numerous worksheets and you want to erase all of them except the current sheet.
The VBA code that would eliminate every sheet in the workbook other than the current sheet is provided below.
Sub DeleteSheetByName()
Dim was As Worksheet
Application.DisplayAlerts = False
For Each was In Sheets
If we. Name <> ActiveSheet.Name Then
ws.Delete
End If
Next ws
Application.DisplayAlerts = True
End Sub
Note:
I have spoken about the application.
Since I don’t want to see a prompt for each removed sheet, the DisplayAlerts attribute is at the top of the code.
5. Using VBA, deleting all sheets other than the active sheet
This is a little more complex example of how to delete worksheets using VBA.
If you have a workbook containing a variety of worksheets and you want to eliminate all the worksheets that contain a particular text string, you can do so using VBA with ease.
For instance, in the workbook below, I want to remove any worksheet that contains the word “Sales” in it.
The VBA code to accomplish it is provided below:
Sub DeleteSheetByName()
Dim ws As Worksheet
Application.DisplayAlerts = False
For Each ws In Sheets
If ws.Name Like "*" & "Sales" & "*" Then
MsgBox ws.Name
ws.Delete
End If
Next ws
Application.DisplayAlerts = True
End Sub
The if-then statement is used in the code above to iterate through each worksheet in the workbook. All of these worksheet names are checked, and if the term “Sales” appears in any of them, the worksheet is destroyed.
The fifth line of the aforementioned code may be modified to search for any other text string if desired.
Also take note of the asterisk (*), a wildcard character, that I’ve used on both sides of the text string that makes up the worksheet name. This makes sure that the string would be erased regardless of where it appeared in the worksheet’s name.
You may change the code to ensure that only worksheets with the text string at the start of the worksheet name are erased.
Use the following code on the fifth line, for instance, to remove all pages that start with the word “sales.”
If ws.Name Like "*" & "Sales" & "*" Then
In this case, I merely used the wildcard character after the text drink. This will guarantee that only worksheet names that begin with the word “Sales” will meet the requirement when the names are checked.
So, these are some of the techniques you might employ to remove Excel sheets. Most of the time, you can accomplish this quickly and simply within the spreadsheet by using the keyboard shortcut or the mouse.
However, you may also utilize VBA if your workbook has a lot of worksheets and you want to swiftly eliminate a certain class of sheets.
I sincerely hope this instruction was helpful.