How to Use VBA to Delete an Entire Row in Excel (Examples)
Working with Excel involves doing routine operations like adding and removing rows.
Although you can easily accomplish this from the worksheet itself, there are situations when you might wish to remove rows in Excel using VBA. These options include removing a particular row, numerous rows in the selection, alternate rows, or rows with a certain value in them.
I’ll demonstrate how to remove rows in Excel using VBA in this tutorial (multiple scenarios).
then let’s get going!
This instruction explains:
1. Using VBA, delete an entire row
2. Delete all the selected rows.
3. Alternate rows should be deleted (or every third, fourth, or nth row).
4. Using VBA, delete Blank Rows
5. Delete Rows Having a Particular Word or Value
6. Application of This VBA Code
1. Using VBA, delete an entire row
You must use EntireRow.Delete function in Excel VBA to delete an entire row.
For instance, you may use the code below to completely remove the first row in a worksheet:
Sub DeleteEntireRow()
Rows(1).EntireRow.Delete
End Sub
The code above utilizes the EntireRow after first identifying the row that has to be erased (by supplying the number in brackets). The deletion method deletes.
By designating these rows in the code, you may also remove many rows at once.
For instance, the code following will remove the worksheet’s rows 1, 5, and 9:
Sub DeleteEntireRow()
Rows(9).EntireRow.Delete
Rows(5).EntireRow.Delete
Rows(1).EntireRow.Delete
End Sub
The code above follows the same principle in that it gives the row numbers, and Excel deletes each row individually.
Important:
Keep in mind to start eliminating rows from the bottom and work your way up when deleting rows using code resembling the example above. For instance, if you start at the top and remove row 1 first, the numbering would be incorrect and all the rows below it would be moved up by one row (as row 5 would become row 4 and so on)
2. Delete all the selected rows.
Use the VBA macro code below if you want to remove all the rows from a particular set of cells:
Sub DeleteEntireRow()
Selection.EntireRow.Delete
End Sub
The EntireRow is affected by the code above. Apply the Delete procedure to the whole selection.
3. Alternate rows should be deleted (or every third, fourth, or nth row).
Every second row (or third, fourth, or Nth row, depending on the data dump) may occasionally be meaningless and need to be removed.
Every other entry in the financial data I used to deal with was empty, so I had to erase it.
This is the kind of situation where VBA excels.
The VBA code that will run over every row in the selection and remove every other row is provided below:
Sub DeleteAlternateRows()
RCount = Selection.Rows.Count
For i = RCount To 1 Step -2
    Selection.Rows(i).EntireRow.Delete
Next i
End Sub
Let me describe the operation of this VBA code.
To start, I calculated the total number of rows in the selection using a variable called RCount.
I then ran this as many times as rows are using a for the next loop. For instance, this loop will go from row 12 to row 1 if there are 12 rows (i.e., 12 times). Since we don’t want the row numbers to change when a row is destroyed, it’s crucial to run this from the last row in the selection to the first.
Additionally, Step 2 is used since we must remove every other row (from bottom to top). Use -3 if you wish to eliminate every third row.
4. Using VBA, delete Blank Rows
To remove all blank rows, use EntireRow.Delete function.
The VBA code that will pick blank cells in the chosen dataset and remove the entire row is provided below.
Sub DeleteBlankRows()
Selection.SpecialCells(xlCellTypeBlanks).EntireRow.Delete
End Sub
The SpecialCells attribute is used in the code above to select and remove all of the empty cells. The ‘Go To Special’ dialogue box can be used with this approach to select all empty cells.
The EntireRow.Eliminate function is used to delete these empty cells after Special Cell has detected them.
Note:
That this approach just chooses empty cells; it does not determine if the entire row is empty or not. Therefore, even if all of the cells in a row are empty, the entire row would still be deleted.
5. Delete Rows Having a Particular Word or Value
Additionally, you can use a straightforward VBA code to iterate through each cell in the chosen range and eliminate any rows where a cell has a certain text or value.
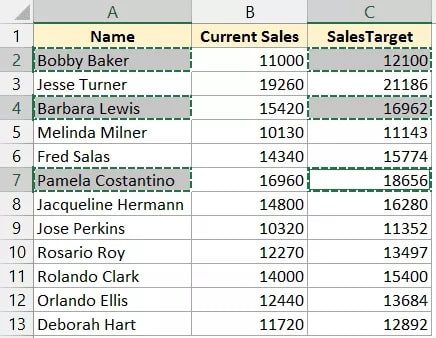
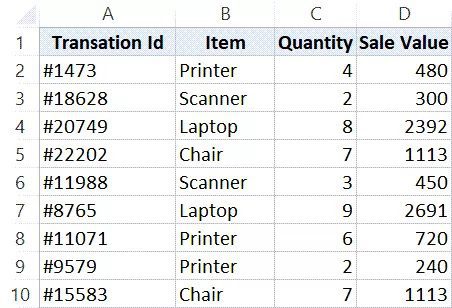
For instance, let’s say you have a dataset and I want to eliminate every cell in the selection that has the word Printer in column 2.
The code to accomplish this is shown below:
Sub DeleteRowswithSpecificValue()
For i = Selection.Rows.Count To 1 Step -1
If Cells(i, 2).Value = "Printer" Then
Cells(i, 2).EntireRow.Delete
End If
Next i
End Sub
The code above starts by counting all of the rows in the selection. The loop will only be repeated thus many times thanks to this. It then cycles over each cell in Column 2 using the “For Next loop.”
The value in each cell of column 2 is then verified using the IF THEN ELSE expression. And if the value or text matches the text that has been supplied (in this case, “Printer”).
In this instance, I have determined whether or not the text fits a particular string. This is also possible with values. For instance, you can exclude any rows with a selling value of 1,000 or higher.
Keep in mind :
It’s vital to keep in mind that the loop starts from Selection in this case. To ensure that the deletion of one row does not affect the rows above it, use the function Rows. Count To 1.
6. Uses of This VBA Code
Let me now demonstrate how to remove the entire row using all the codes discussed in this article.
These scripts must be copied and pasted into a module in Excel VB Editor. You may then execute the macro codes after copying these codes.
- The procedures for pasting these VBA scripts into a module are listed below: Press the F11 key while holding down the ALT key (or, on a Mac, Function + Option + F11). With this, the VB Editor will launch.
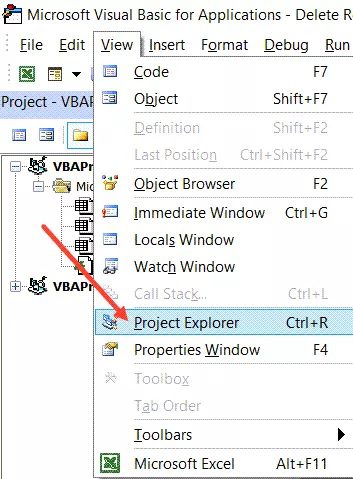
- The project explorer is located on the left in the VB Editor. If you can’t see it, select Project Explorer from the View menu.
- Select any item in the Project Explorer by right-clicking it (for the workbook in which you want to run the code).
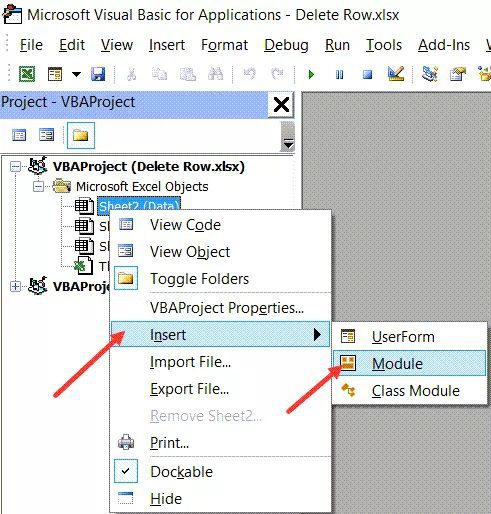
- Click Module after going to Insert. This will insert a new Module for the workbook
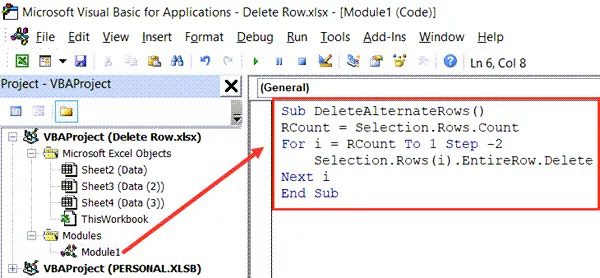
- In the module, copy and paste the aforementioned codes.
Additionally, you may run these scripts by placing the cursor anywhere in the code and pressing the F5 key (or clicking on the green triangle in the VBA toolbar).
I’ve also created a thorough lesson that explains the various approaches to running VBA macros in Excel.
You could also think about adding these scripts to the Personal Macro Workbook before adding them to the QAT if you need to use any of them frequently. This will enable you to access the code with a single click in any of your workbooks.
These VBA routines may be used to remove whole rows from Excel (in different scenarios). If you wish to delete columns instead of rows, you may use the same reasoning (with the corresponding adjustment in the code examples).
I hope this instruction was helpful.