Most of us use Excel to work with tabular data organized in columns.
Going to the end of the information in the column is just another typical job that most Excel users must perform (i.e., the last filled cell).
While you can rapidly navigate to the last filled cell at the end of the column or fast select the entire column up until the previously served cell using a simple keyboard shortcut, things can become a little more challenging if the column contains blank cells.
In this lesson, I’ll go over a few easy methods you may use in Excel to rapidly choose the end of a column, including keyboard shortcuts.
The approach you select will depend on the organization of your data, and I’ll make sure to list the advantages and disadvantages of each course I explored in this article.
This instruction explains:
Keyboard Shortcut to Select the End of the Column (CONTROL + SHIFT + Arrow Key)

Keyboard Shortcut to Select the End of the Column (CONTROL + SHIFT + End

Using the Name Box

Using Go To Dialog Box
Shortcut on the keyboard for choosing the column’s end (CONTROL + SHIFT + arrow key)
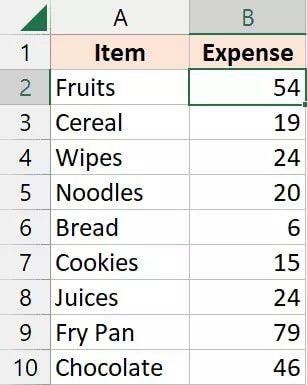
I want to select all the expense values in column B in the data set below, which has the items in column A and the daily expenses in column B.

Using the keyboard shortcut listed below, you can quickly pick the entire column if your data set contains no blank cells in any of the cells in the column:
Control + Shift + Down Arrow Key
To utilize the keyboard shortcut above:
- Choose the first cell you want to include in the selection (cell B2 in this example)
2. Holding down both the Control and Shift keys (together)
3. Press the down arrow key once while holding down the Control and Shift keys.
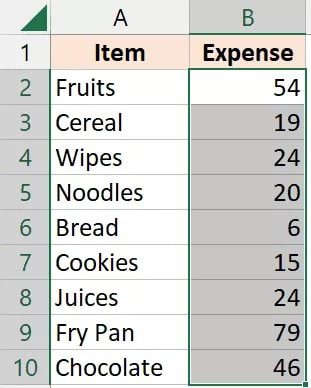
The selection would miraculously expand from the first selected cell in the column to the last filled cell by using the aforementioned keyboard shortcut.
However, just as life isn’t perfect, neither is your Excel data.
Columns of data frequently contain blank cells, which makes it difficult to select the complete column until the last full cell.
When a column has blank cells
I want to start with cell B2 and choose until the end of the data in column B in the example below. However, column B has some blank cells.
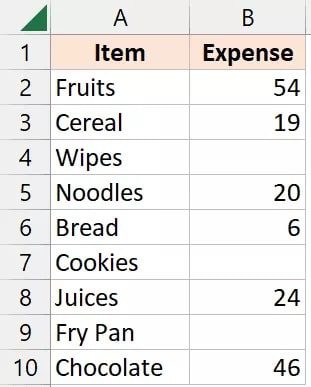
If you try to utilize the aforementioned keyboard shortcut with this data set, you will observe that the selection is only created up to the cell before the first empty cell.

Therefore, we must slightly modify the same keyboard shortcut.
When a column has blank cells, follow these procedures to select all of the data until the end of the column:
- Please choose the first cell from which you wish to start the selection (cell B2 in our example)
- Hold down both the Control and Shift keys.
- Hold down the down arrow key while pressing it.
- Press the up arrow key once you’ve reached the worksheet’s last column (while still holding the Control and the Shift key)
Even though this is not the most elegant method, it gets the job done, and if your column does not have a lot of empty cells, it could go very quickly.
When there are many blank cells, for example, this strategy might not be the best to employ (say, an empty cell in every other row or after every two or three rows). Even though the technique would still function in this case, it might take a few more seconds (which, in my experience, is not something most Excel users are willing to give).
Shortcut on the keyboard for choosing the column’s end (CONTROL + SHIFT + End)
I want to select all of the expense numbers in column B in the data set below.

Another keyboard shortcut you can use to choose the last row of data in a column is as follows:
Shift + Control + End
The steps to use this keyboard shortcut are as follows:
- Choose the first cell from which you wish to start the selection (cell B2 in our example)
- Hold down both the Control and Shift keys.
- Hit the End key.
The selection would be made using the earlier processes, starting at cell B2 and continuing until the last cell was used.
Since the last cell in your column is typically the last one to be used, using this keyboard shortcut to select the previous row of data in the column should always work.
The beautiful thing about this method is that it chooses every cell between the first selected cell and the last used cell, so you don’t have to worry about blank cells.
If You Have More Information to the Right
When you press Control + Shift + End, the selection begins in the cell you’ve chosen (B2 in our example) and extends to the last cell in the range that was used.
The keyboard shortcut described above would therefore select the current column as well as any further data that is to the right of it if there is more data to the right of the column.
And occasionally, even after you erase the data, Excel will still retain the used range in its memory. Excel’s used range, for instance, would be A1:E20 if I entered a value in cell E20 and subsequently deleted it (as E20 is the last used cell in the memory of Excel).
Therefore, it’s possible that using the aforementioned keyboard shortcut will pick extra cells below and to the right of the column that we’re trying to select.
You can apply the same keyboard shortcuts in this situation with a slight modification:
- Choose the first cell from which you wish to start the selection (cell B2 in our example)
- Hold down both the Control and Shift keys.
- Hit the End key.
- Keep the Control and Shift keys pressed, press the Left key once, and then press the Up arrow key once if further blank rows and columns have been selected.
- When only the necessary column is selected, hold down the Shift key while continuing to press the left arrow key.
Even though this is not the most elegant approach, after you get used to it, you will realize that it is quicker than manually selecting a column till the end of the data.
Using the Name Box
By typing the reference in the name box, you can rapidly choose a group of cells.
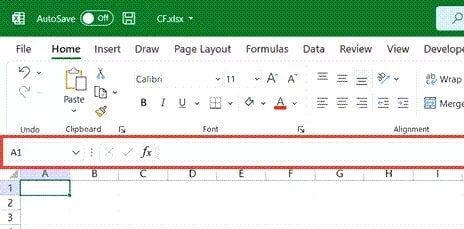
The name box can be found immediately below and to the left of the formula bar.

Let’s imagine I have blank cells in column A, making it difficult to use the keyboard shortcut Control + Shift + Down arrow key to pick the column from cell A2 up to the last filled cell.
The procedures for using the name box to pick all of column A’s data, up until the last filled cell, are listed below:
- The Name Box using the pointer.
- In the Name Box, provide the following cell reference: A2:A1048576

3. Press the Enter button. This will choose every cell within the designated range.
4. Press the Up arrow key while continuing to hold down the Control and Shift keys.
The aforementioned actions would choose every cell in column A up until the final filled cell.
Note: This solution also functions on Google Sheets (you can use the exact same steps)
Go To Dialog Box be using
Similar to the Name Box, you may rapidly choose a set of cells by entering their reference in the Go To dialogue box.
Say I wish to choose the range B2 to B100.
- The procedures to complete this using the Go To dialogue box are listed below.
- Navigate to the worksheet and choose this range there.
- F5 should be pressed on your keyboard. The Go-To dialogue box will be displayed.

Put the reference to the cell below in the Reference field.
B2:B100

4. Hit OK.
In the Go-To dialogue box, there were some actions that would immediately choose the range you entered.
These are some of the shortcut methods that you can use to quickly choose data from the beginning of a column to the end of the data.
The methods I’ve discussed here have been demonstrated using data in a column, but you can also use the same techniques to choose data down the rows.
Although you can always perform this by hand using the mouse, if you need to do it frequently, knowing these shortcuts can significantly increase your productivity.
I hope you find this post useful.


